

We built a Wordle Solver in Svelte - Here is how we did it

Why this project?
While brainstorming for a pretty good project to explain how you can use your programming skills to solve problems, we had some interesting discussions on which topics would be interesting. We couldn’t really settle for one, so we let our ideas settle a little bit to get the creativity growing.
A few days ago people on Twitter started to use and play Wordle. It was suddenly everywhere. Wordle the Word-Quiz. You get one chance per day to guess a 5 letter word in 6 tries. Every time you try, the game tells you if your letters are correct, correct but on the wrong spot or not even in the word.
Everyone was hooked and the Twitter timelines were filling with Wordle Result patterns of people playing the game. As a programmer, you may think “Hmm. A problem that has to be solved under certain conditions, that’s something a program could do.” And when I mentioned this idea we immediately knew - This should be our first project.
Here you can find the solver if you want to play with it first.
How does the game work?
In order to understand how to make a solver, we had to understand how the game works. So we spend a few more or less successful days following the daily wordle quizzes available.
You have six tries to find a 5-letter word unknown to you. When you enter a word the quiz will give you hints. It marks letters as gray that are not in the word, it marks them as yellow when they are in the word but on another spot and it will mark them in green when they are at the right spot. Following these clues, you need to find out which word the quiz is looking for.
The game rules are easy to understand but coming up with words while playing it, is the hard part.
After understanding the rules, we wrapped them up and went into theorycrafting the solution.
Theorycrafting in Jupyter Notebooks
The first prototype was then made in Python - more precisely in a Jupyter Notebook. Jupyter is a great way to experiment and theorycraft because instead of having to run the whole program or code over and over again when you make changes, you can decide to rerun only the cells that you change. The workflow when trying things out is so much nicer in Jupyter Notebooks that we took this extra step before even considering making a fully functional website for the Solver.
The basic functionality on how the Solver is supposed to work
We have a list of possible 5-letter words which could all be the word Wordle is looking for. We then feed the program the first word we typed into Wordle and then tell the program what kind of feedback we got back. Is the letter wrong, right but on the wrong spot, or on the right spot?
The program saves the information about every letter and then uses these constraints to filter out words that can’t be the result anymore. It then gives out a list of words that are still in the race.
From there we enter the next word and again give the solver the constraints coming from Wordle. The list of possible words will shrink extremely fast and we usually got the right word within 2 or 3 rounds depending on how strong our starter word was.
Setting up Svelte as the Framework of choice to make a Wordle Solver Website
Since this is not going to be a tutorial on how to set up Svelte as a project I will only give a brief explanation on how to do it. I will later give a longer and better tutorial for setting up your own Svelte and Svelte-Kit projects but since this should be mainly about the Wordle solver, we quickly summarize it.
npx degit sveltejs/template wordle-solver-svelte
This command fetches the files from GitHub and installs them locally + creates a folder named “wordle-solver-svelte”.
cd wordle-solver-svelte
This command then changes into the folder that you just created.
npm install
This command then installs the dependencies
npm run dev
And with this command, you start your local server that is then available under http://localhost:8080/.
Changes you make to the code appear almost immediately on the page and that way you can always see what you changed.
Creating the layout first
Since we pair programmed on the website together we split up to work on different files with VS-Code Live Share. While I took care of the CSS, fonts, and color schemes, Coldino worked out how we design the user interface used to enter the words from Wordle and how to decide about the different stages letters can have.
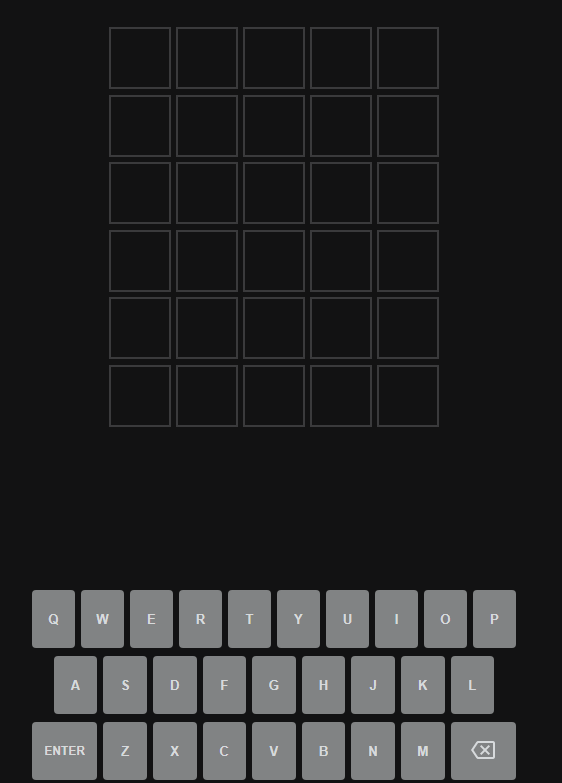
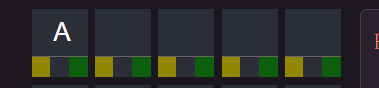
We had a few different ideas about that input which all had their pros and cons especially considering we wanted to make it usable for mobile and PC. We then decided to have a field under every letter that allows toggling between the different stages. So you basically tap or click until the letter has the color Wordle tells you.
The overall design was a little inspired by magazines, to give the site a little bit of the feel of solving a crossword puzzle. The idea was to keep it as compact as possible that you neither have to scroll a lot on PC nor on your phone to use all parts of the website.
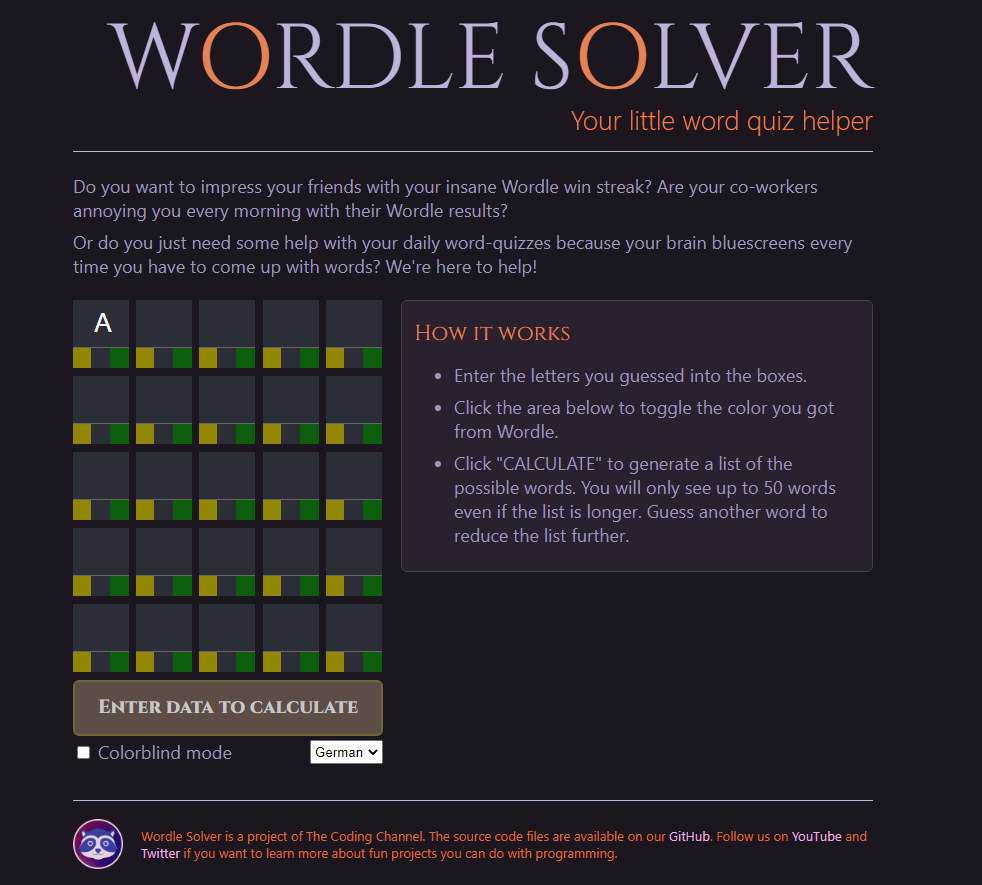
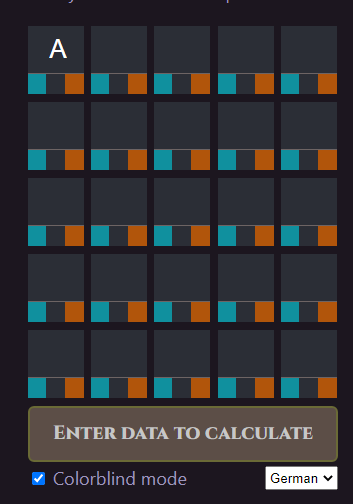
We also made sure to integrate a colorblind mode, because Wordle heavily relies on colors for solving the quiz and therefore offers a colorblind mode as well. To cater towards accessibility for the site, we integrated it in a similar way.
How the Solver works
Once the Layout was decided, we needed to add the brain to the website - the actual solver. Because we already built a complete functional command-line version of the Wordle Solver, we just needed to translate the logic used there into JavaScript or rather the Svelte interpretation of JavaScript. Here’s how it works:
To solve a problem like Wordle, one easy way is to build up a set of “constraints”, or restrictions - information on what has been discovered so far. These constraints can be improved as more information is discovered and used to scan through the word list to find possible matches. In our case we decided to keep the following information for each possible letter:
class LetterInfo {
    constructor() {
        this.min_count = 0;  // Letter must appear at least this many times
        this.max_count = 5;  // Letter must appear no more than this many times
        this.correct = [];   // Positions that must contain this letter
        this.present = [];   // Positions that cannot contain this letter
    }
}
For each letter we work out how many times it can be present in a word, the positions it must be present in, and the positions it must not be present in. As the user enters more guesses we refine and improve these constraints and the list of matching words shrinks!
1. Building up the constraints
There are three different potential states for each letter we input. “Absent”, which means that it’s a letter that can’t be found in the word we are looking for. The second state is called “Correct” which means the letter is in the word and also already on the correct spot within that word. And the last state is “Present” and it means the letter is present but just not on the spot we put it on.
When we first worked on these definitions, we ran into a problem we hadn’t considered before. If our example word had the same letter twice but the letter only existed once in the word we are looking for, it would mark one letter either as present or correct and the second one as absent. That caused the letter to be removed completely from our possible combinations. So we had to build in a little safety net that would not blow up our program in these cases. “Absent” letters are not treated as booleans anymore. Instead, we count the letters that appear.
First, we make a function that can analyse a single word. The input parameters are the word itself, the states for each letter (absent/present/correct), and the dictionary we use to collect constraints, which we call knowledge.
Each letter-state pair is checked and used to generate new constraints for our knowledge base. As we go through each letter of the word we also keep track of how many times the letter is seen.
- If the state is “Absent” this is easy - we reached the maximum amount of times that this letter can appear in the word - this is our solution to the “double letter” problem above. This amount is recorded in the letter’s
max_countfield. - If the state is “Correct” we simply make a note of which position the letter occurs by adding the position to the letter’s
correctarray. Keep in mind - even correct letters can appear more than once in the word and so we increase themin_countand keep the possibility open to deal with the letter again later. - If the state is “Present” we just need to make a note that this letter cannot be in this position. To do this we store it in the
presentarray. We also increasemin_countto say how many of these letters must be present.
By the end of this function, we’ve hopefully learned a little more about which letters can appear in the target word, where they can and can’t be used, and how many times they can appear.
function analyseWord(knowledge, word, states) {
    word = word.toLowerCase();
    const foundLetters = {};

    for (let i=0; i<5; i++) {
        const char = word[i];
        const state = states[i];

        // Keep track of how many times letters appear in this word
        foundLetters[char] = (foundLetters[char] || 0) + 1;

        // Ensure we have an info object for this letter
        if (!(char in knowledge)) {
            knowledge[char] = new LetterInfo();
        }

        const info = knowledge[char];

        if (state === 'absent') {
            // Incorrect: limit the count of this letter
            info.max_count = Math.min(info.max_count, foundLetters[char]-1);
        } else if (state === 'correct') {
            // Correct: add this position to the 'correct' options
            info.correct.push(i);
            info.min_count = Math.max(info.min_count, foundLetters[char]);
        } else if (state === 'present') {
            // Present: add this position to the 'present' options
            info.present.push(i);
            info.min_count = Math.max(info.min_count, foundLetters[char]);
        }
    }
}
2. Testing Words
So we’ve analysed a few words and put some constraints into our knowledge base. Now we can use this to narrow down the list of possible answers. There’s no real shortcut here - we simply have to check every word in Wordle’s dictionary against our entire set of constraints, knocking out any words that break one of the constraints.
The next function we implement will just check a single word against our set of constraints. So, we pass in the word and our knowledge and get back a boolean that tells us if the word is a possibility.
All we need to do here is step through each letter in the knowledgebase and perform tests on all of the information in there:
- Check that the number of times the letter appears is between
letter.min_countandletter.max_count. - Check that none of the positions in
letter.presentcontain this letter. - If
letter.presentis not empty, make sure the letter appears somewhere in the word. - Check that all positions in
letter.correctcontain this letter.
If the word passes all these checks then it’s good to go.
function isWordValid(word, knowledge) {
    const letterCounts = {};
    for (const char of word) {
        letterCounts[char] = (letterCounts[char] || 0) + 1;
    }

    // Step through all of our constraints looking for reasons to deny this match
    for (const [char, info] of Object.entries(knowledge)) {
        // Are there between min_count and max_count of this letter?
        if (letterCounts[char] < info.min_count || letterCounts[char] > info.max_count) {
            return false;
        }

        // Anything in a misplaced position is a failure
        for (const pos of info.present) {
            if (word[pos] === char ) {
                return false;
            }
        }
        // ...but present letters must also be in the word
        if (info.present.length !== 0 && !word.includes(char)) {
            return false;
        }

        // Any positions in present must be this character
        for (const pos of info.correct) {
            if (word[pos] !== char) {
                return false;
            }
        }
    }

    return true;
}
3. Bring it all together
With the functions we’re written so far we can gather information from individual guesses and we can test if individual words are valid. Let’s combine these into a single function that analyses all user input and outputs a list of words that are found to be possible matches.
We implement this with two loops...
The first loop goes over the input grid. It only accepts full words - ones that have all 5 letters entered, then it uses our analyseWord function to discover and add any new constraints to our knowledge.
The second loop is implemented using the standard Array.filter function, which lets you test each element in an array and makes a new array with just those elements which pass.
export function doCalculate(word_grid, state_grid, dictionary) {
    const knowledge = {};

    // Step through full words in the grid adding constraints for each letter
    for (let i = 0; i < word_grid.length; i++) {
        const word = word_grid[i].join('');
        if (!word || word.length !== 5) continue;

        // Analyse this word, improving our knowledge
        analyseWord(knowledge, word, state_grid[i]);
    }

    // Step through all possible words looking for ones that match our knowledge
    const foundWords = dictionary.filter(word => isWordValid(word, knowledge));

    return foundWords;
}
By the end of this function, we’ve worked out which words are still possible and can show them to the user. Job done!
With all this code it may seem that it takes a while until we can figure out the right word but in reality and depending on how strong and lucky the starter word is, it only takes 2-3 words to narrow it down to only one word.
If you want to check out the code yourself and maybe also build your own Wordle-Solver website, visit our repository at The Coding Channel GitHub.
This blog post and the Wordle Solver are a team project with coldino for The Coding Channel.